articles To Read

5 Minimalistic DIY Projects To Decorate Walls

DIY Floating Large Format Prints

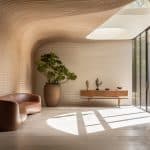
The minimalistic interior design style could make your home look plain, boring and sterile, just because your home’s style is minimalistic does not mean you can’t have decorations. But purchasing decorations can be quite costly so consider these affordable yet visually appealing DIY projects to spice up your home. To make it extra simple for you, we have broken down the instructions into five or less steps and provided you with the list of materials required for each DIY! Spice up your home minimalistically with us.

kitchen island interior design
Minimalistic Living Room.
View Portfolio Here: https://destyle.com.sg/martin-modern/

# DIY 1: Floating Large Format Prints

Say hello to one of our favourite ways to make your space feel truly yours. Floating acrylic frames are a wonderful clean and minimalistic way to highlight your artwork, but they can be expensive! Follow along for an easy DIY option with a budget!

DIY Floating Large Format Prints
DIY Floating Large Format Prints.

Materials You Will Need

  • 4x Stand Off Mounts
  • Clear Acrylic Sheet (per your desired size)
  • ‘The Artwork’
  • Power Drill
  • Screws to mount hardware
  • Painter’s tape
  • Any type of transparent glue like glue dots
  • (Optional) Laser Level

Let's Get Started With The DIY!

Step 1: Paste the four corners of the acrylic with painter’s tape to prevent cracking of acrylic when drilling. Slowly apply light pressure to drill through the acrylic, rinse and repeat for all corners.

Step 2: Measure and mark where you will need to drill in the stand off mounts. (Tip: Use a laser level to make sure everything is straight!)

Step 3: Drill the wall to attach the stand off mounts on the wall.

Step 4: Adhere artwork to acrylic directly with your choice of glue

Step 5: Line up the holes and screw the sheet of acrylic with artwork adhered onto the standoff mounts. And you are done! A beautiful artwork with a clean and modern look to bring some creativity to your home is completed.

# DIY 2: Framed Floating Plants / Hanging Plants

This project will not not only save the environment but also create a lovely hanging planter that will bring a modern minimalist interior design style to your home.

DIY Hanging Plant Pots
DIY Hanging Plant Pots.

Materials You Will Need

  • Used Shampoo Bottle
  • Scissors or Pen Knife
  • Leather Hole Puncher
  • String/Leather/Suede/Twine (whichever you prefer)
  • Hooks/Nails for wall
  • (Optional) Spray paint colour of your choice if shampoo bottle is not your ideal colour

Let's Get Started With The DIY!

Step 1: Using your shampoo bottle, remove the pump and cut the bottle per your design sizing using a pen knife or scissors.

Step 2: (Optional) Spray paint the shampoo bottle and leave to dry as per spray paint instructions.

Step 3: Drill and add nail/hook to the wall in preparation. Using the hold punch, hold punch either side of the bottle.

Step 4: String the String/Leather/Suede/Twine (whichever you prefer) through the hole and knot from the inside of the bottle.

Step 5: Add your plant/succulent of choice and you are done! Hang it on your wall and there’s your accent piece for your room.

# DIY 3: Turning Storage Into Display

The perfect blend of function and beauty in interior design, this multifunctional pegboard is beautiful enough to act as a piece of art on its own but also serves as storage at the same time. If you haven’t experimented with a pegboard in your home, consider it time to make one yourself!

DIY Storage Display Peg Board Set
DIY Storage Display Peg Board Set.

Materials You Will Need

  • 1x Sheet of Plywood (per your desired size)
  • Wooden Planks (Shelves cut to desired lengths)
  • Wooden Dowels (Should fit the drilled holes & cut to desired lengths)
  • Pencil
  • Tape Measure
  • Power Drill
  • Sanding Paper
  • Trim head Screws
  • (Optional) Stain/Paint of your choice & Top Coat
  • (Optional) Laser Level

Let's Get Started With The DIY!

Step 1: Decide on the spacing you desire for the pegboard and mark where you are going to drill on the plywood.

Step 2: Drill all the marked spots on the plywood carefully to avoid splinting. (Tip: Use scrap wood below to avoid drilling through your work surface)

Step 3: Sand the plywood to get rid of any splinters and to clean up the surface.

Step 4: (Optional) Paint/Stain the plywood in your desired finish and seal it with a clear top coat. It can also be left without staining or painting, but do note that plywood is particularly susceptible to water damage.

Step 5: Mount the board to the wall by drilling it into the wall with your screws. (Tip: Use the laser level to mark where to drill) Add the dowels and shelves per your liking and you are done! Start using your pegboard to display and store your items!

# DIY 4: Wall Hanging Shelves Set

This DIY shelving unit can be used in a variety of settings, whether it is the living room, bedroom or even kitchen room design. The three shelves can also be adjusted accordingly by re-tying to make room for taller items as needed, giving you a degree of flexibility for decorative and functional use.

DIY Wall Hanging Shelves Set
DIY Wall Hanging Shelves Set.

Materials You Will Need

  • 3x Wooden Shelves (per your desired size)
  • 2x Paracord (per your desired length)
  • 2x Large Screw Hooks
  • 2x Black Rings
  • Power Drill
  • Tape Measure
  • Sand Paper
  • (Optional) Stain/Paint of your liking & Top Coat
  • (Optional) Laser Level

Let's Get Started With The DIY!

Step 1: Using a spade bit, drill holes in the four corners of your wooden shelves approx. 2.5cm in from the edge.Make sure to sand down the wooden shelves to get rid of any splinters.

Step 2: Drill the wall and insert the large screw hooks accordingly. (Tip: Use a laser level to make sure it is straight)

Step 3: (Optional) Paint/Stain the wooden shelves in your desired finish and seal it with a clear top coat. It can also be left without staining or painting.

Step 4: Next, take your paracord and cut two pieces to your desired length. Take these two lengths of cord in one hand and fold them in half. Take the folded end and feed through the ring and then pull the loose ends through the folded end so it creates a knot around the ring as per image above. Now, feed the string through the holes of your shelf and tie a knot. Repeat with the other holes and other string for all the shelving.

Step 5: Hang it up and decorate it with your favourite display pieces!

# DIY 5: Wall Clock

This stylish yet minimalistic wall clock is trending, instead of purchasing one that’s way overpriced, why not do it yourself! This functional clock will be the perfect addition to your home, filling the space with style.

DIY Hanging Plant Pots
DIY Hanging Plant Pots.

Materials You Will Need

  • Round Wooden Chopping Board
  • Leather Hole Puncher
  • Old Belt or Black Leather Strap
  • Any type of flat shallow screw, we will be using brass screws
  • Screw Driver
  • Clock Mechanism
  • Pencil & Ruler
  • Power Drill

Let's Get Started With The DIY!

Step 1: Measure and mark the centre point on your wooden chopping board with your pencil and ruler. Thereafter, drill the centre point the whole way through.

Step 2: Cut a strip of the black leather to your desired length. For reference, you can measure it together with the chopping board to see what’s the length perfect for you! Trim the edges neatly and then make a hole in either end using the leather punch.

Step 3: Mark halfway down both sides of the chopping board edge, this would be where you have to drill to attach the leather strap previously cut. This will give a small dip for your screws, making it much easier for them to go in.

Step 4: Place one leather end over the drilled dip, place your screw in and twist with a screwdriver until the screw is flush to the leather. Repeat on the other side.

Step 5: Thread your clock mechanism through the central hole in the chopping board and follow the instructions you received with the clock mechanism to assemble it. You are done! Hang your DIY clock proudly wherever you desire!

Now that you know how to decorate your home using these DIY projects, it’s time to put these projects and tips into action. You can use these DIYs to add creative and interesting touches to your walls and make it uniquely yours while sticking to minimalistic interior design style.

Let De Style Find Your Style

We hope you enjoyed this article. Tell us what you would like to read next! Feel free to write to us anytime at editors@destyle.com.sg.

Head on to Our Portfolios to see our proud work!

If you are looking to build your dream home, then look no further tan us. Book a consultation with De Style today.

Related Articles

Let’s chat
View